Documentation Varroa Detector
There is a video tutorial available that shows the procdeure of an analysis. Additionally to the main functionality of Varroa Detektor there is now a new feature available called „EstimHelper“ (Estimation Helper). This feature offers support to perform the Liebefeld estimation method. E.g. to estimate the amount of food or the number of bees in a bee hive.
New !!! Since V1.13 Varroa Detector uses per default a neuronal network based on tensorflow to automatically detect varroa mites. This detector needs a little bit more time for an analysis than with the old „contour detector“ but showed a much higher hit rate. If you are not satisfied you can switch back to the old fast „contour detector“ via the menu „Settings->Image Analysis->Select detector“. In future I will improve the neuronal network. I am also working on a solution to let users who want to participate to upload their analysis results in order to train the neuronal network.
Add bee hives
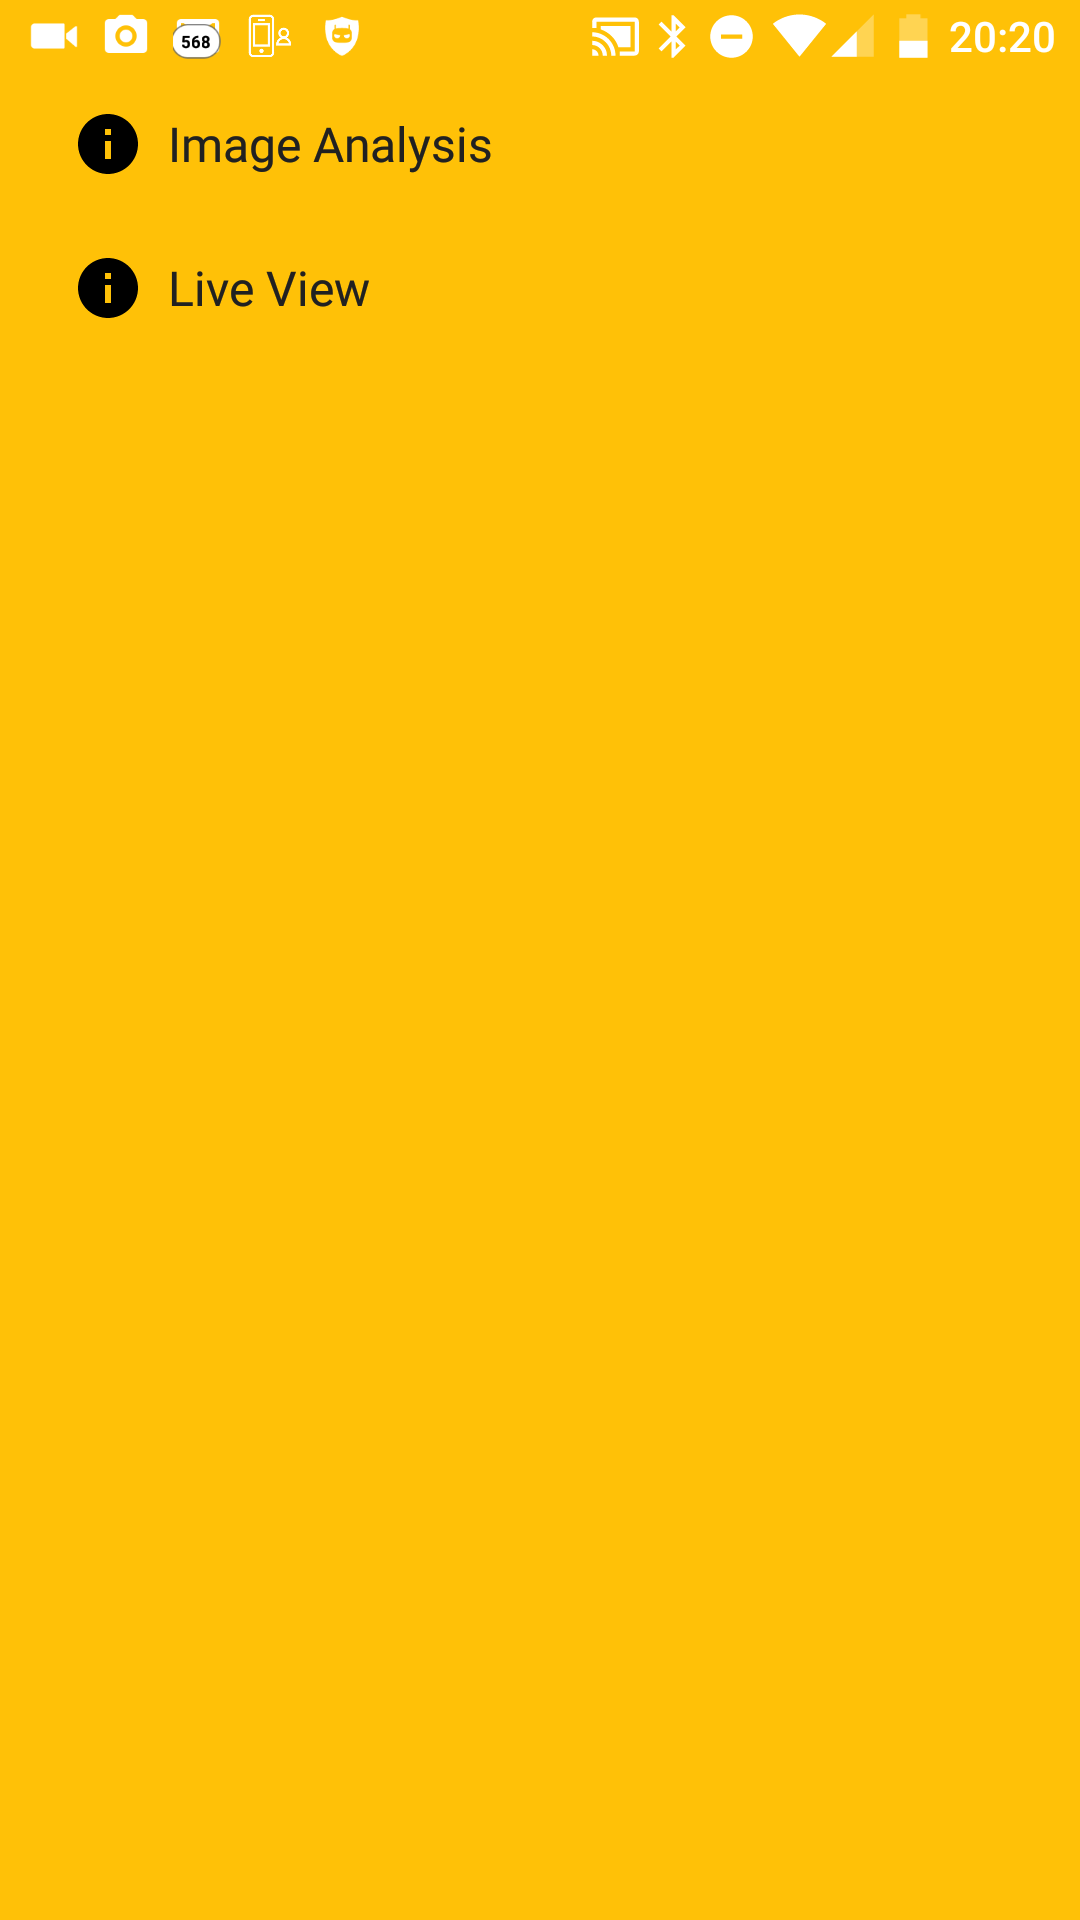
 If you start the APP the first screen you see is the main menu. Initially it looks empty and indeed we first have to add our bee hives before we can start documenting Varroa inspections. To set the name of our apiary and to add new hives we press the top menu entry APIARY.
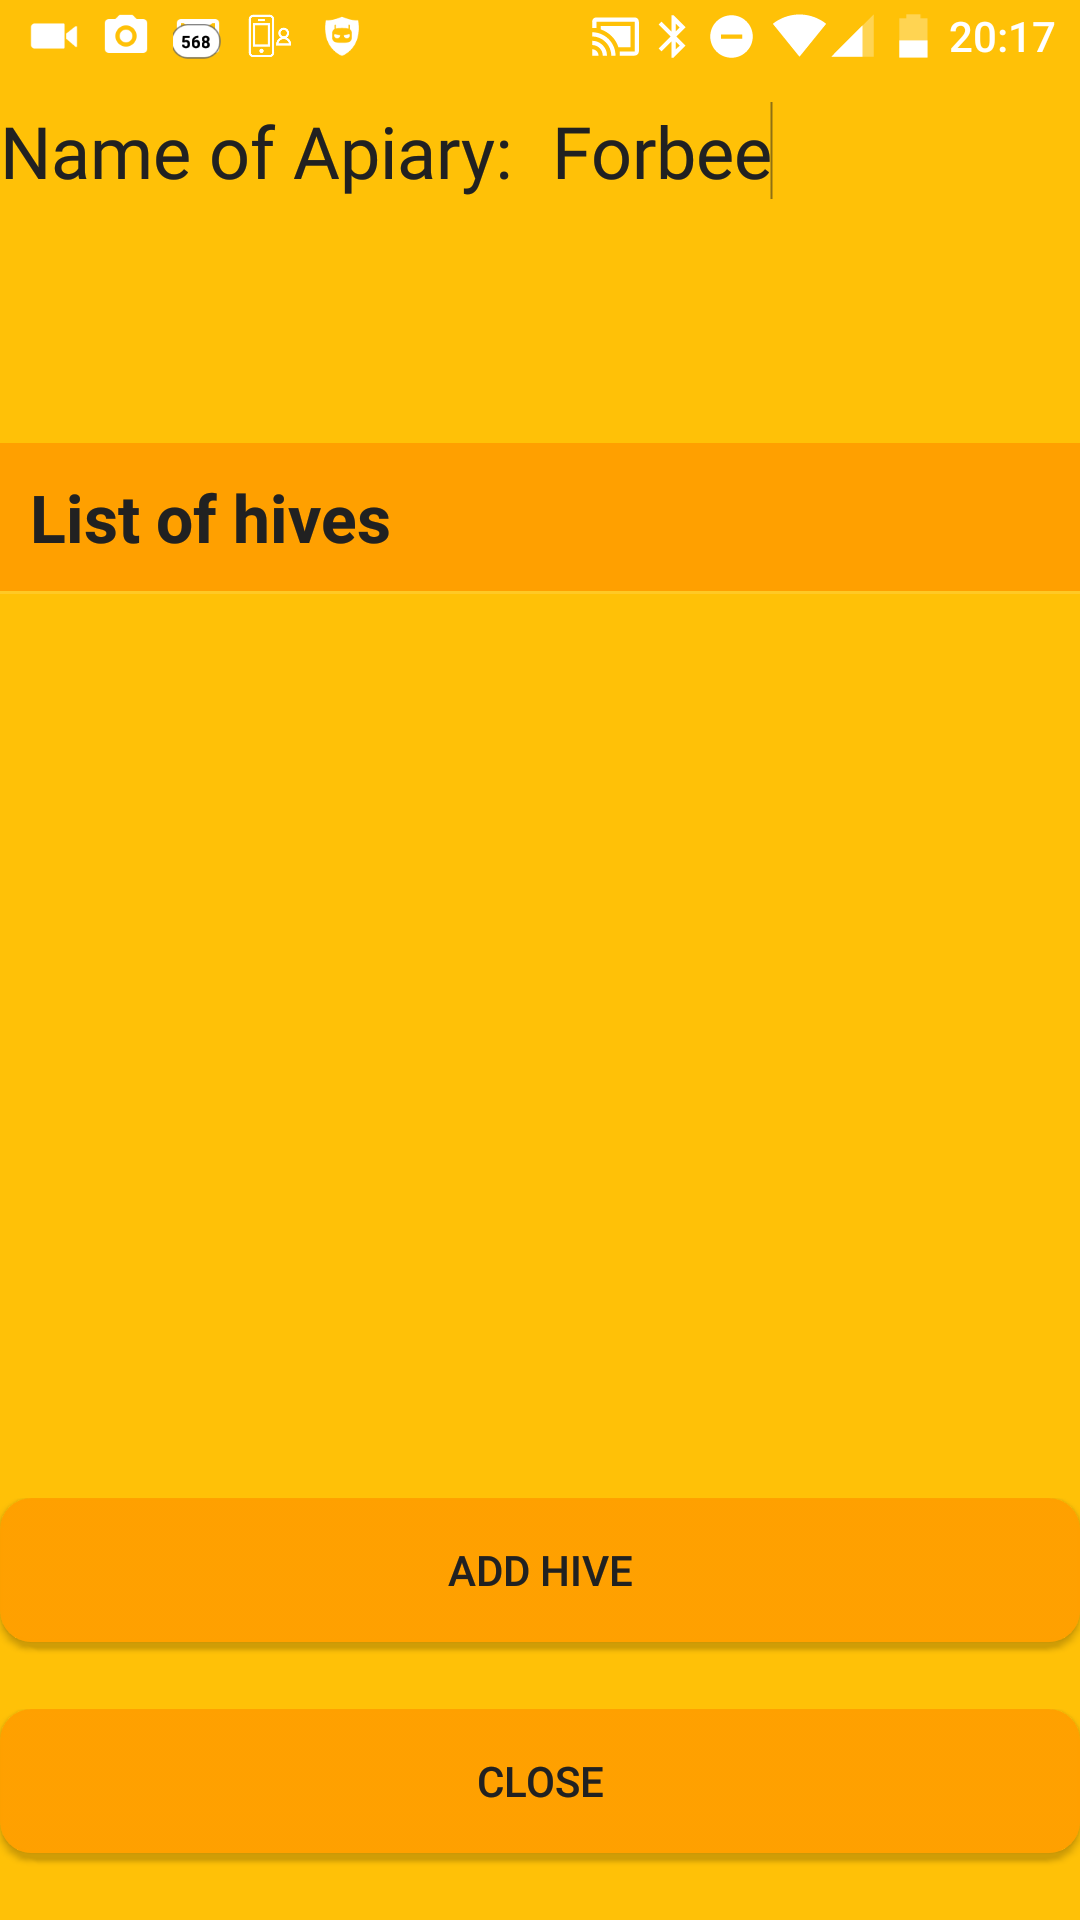
In order to add our first bee hive press „ADD HIVE“. In the following screen you can enter the name of this hive and select a picture of the hive (to choose a picture you have to click on the logo next to the name).
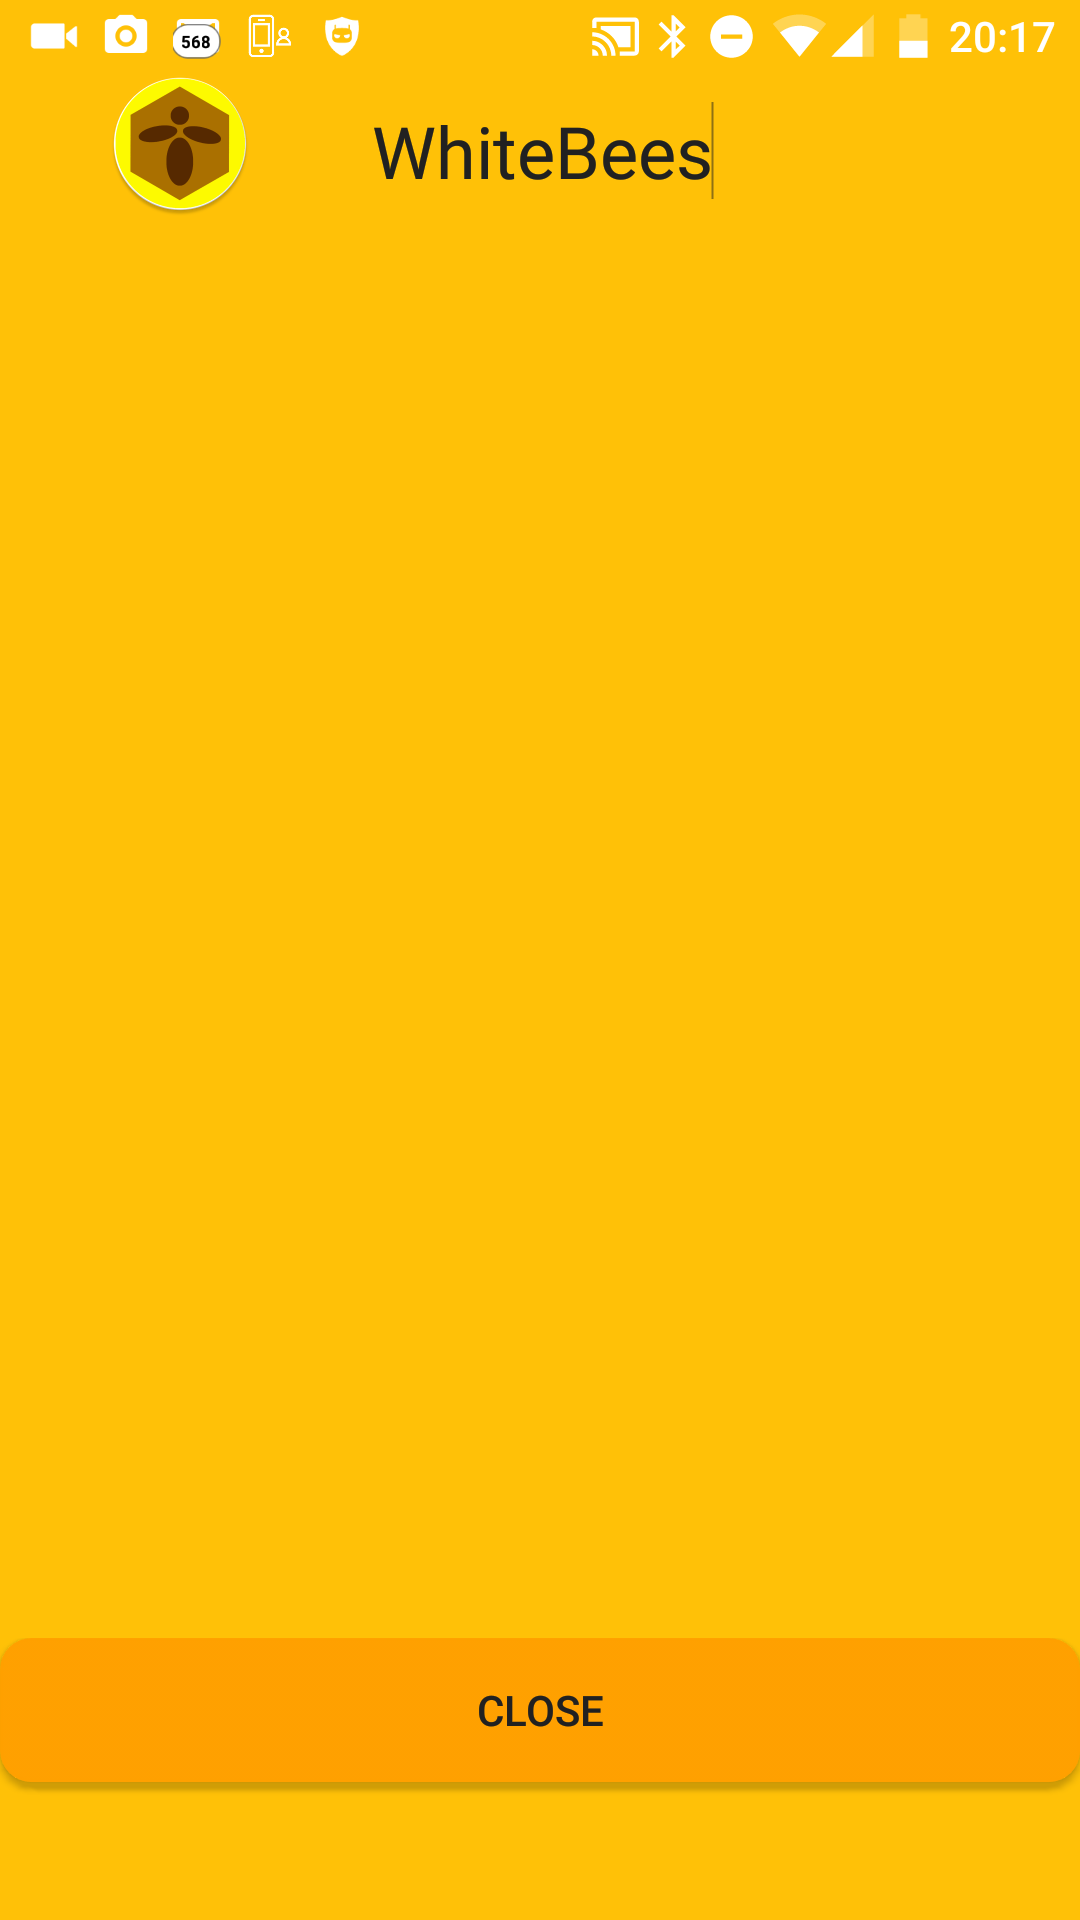

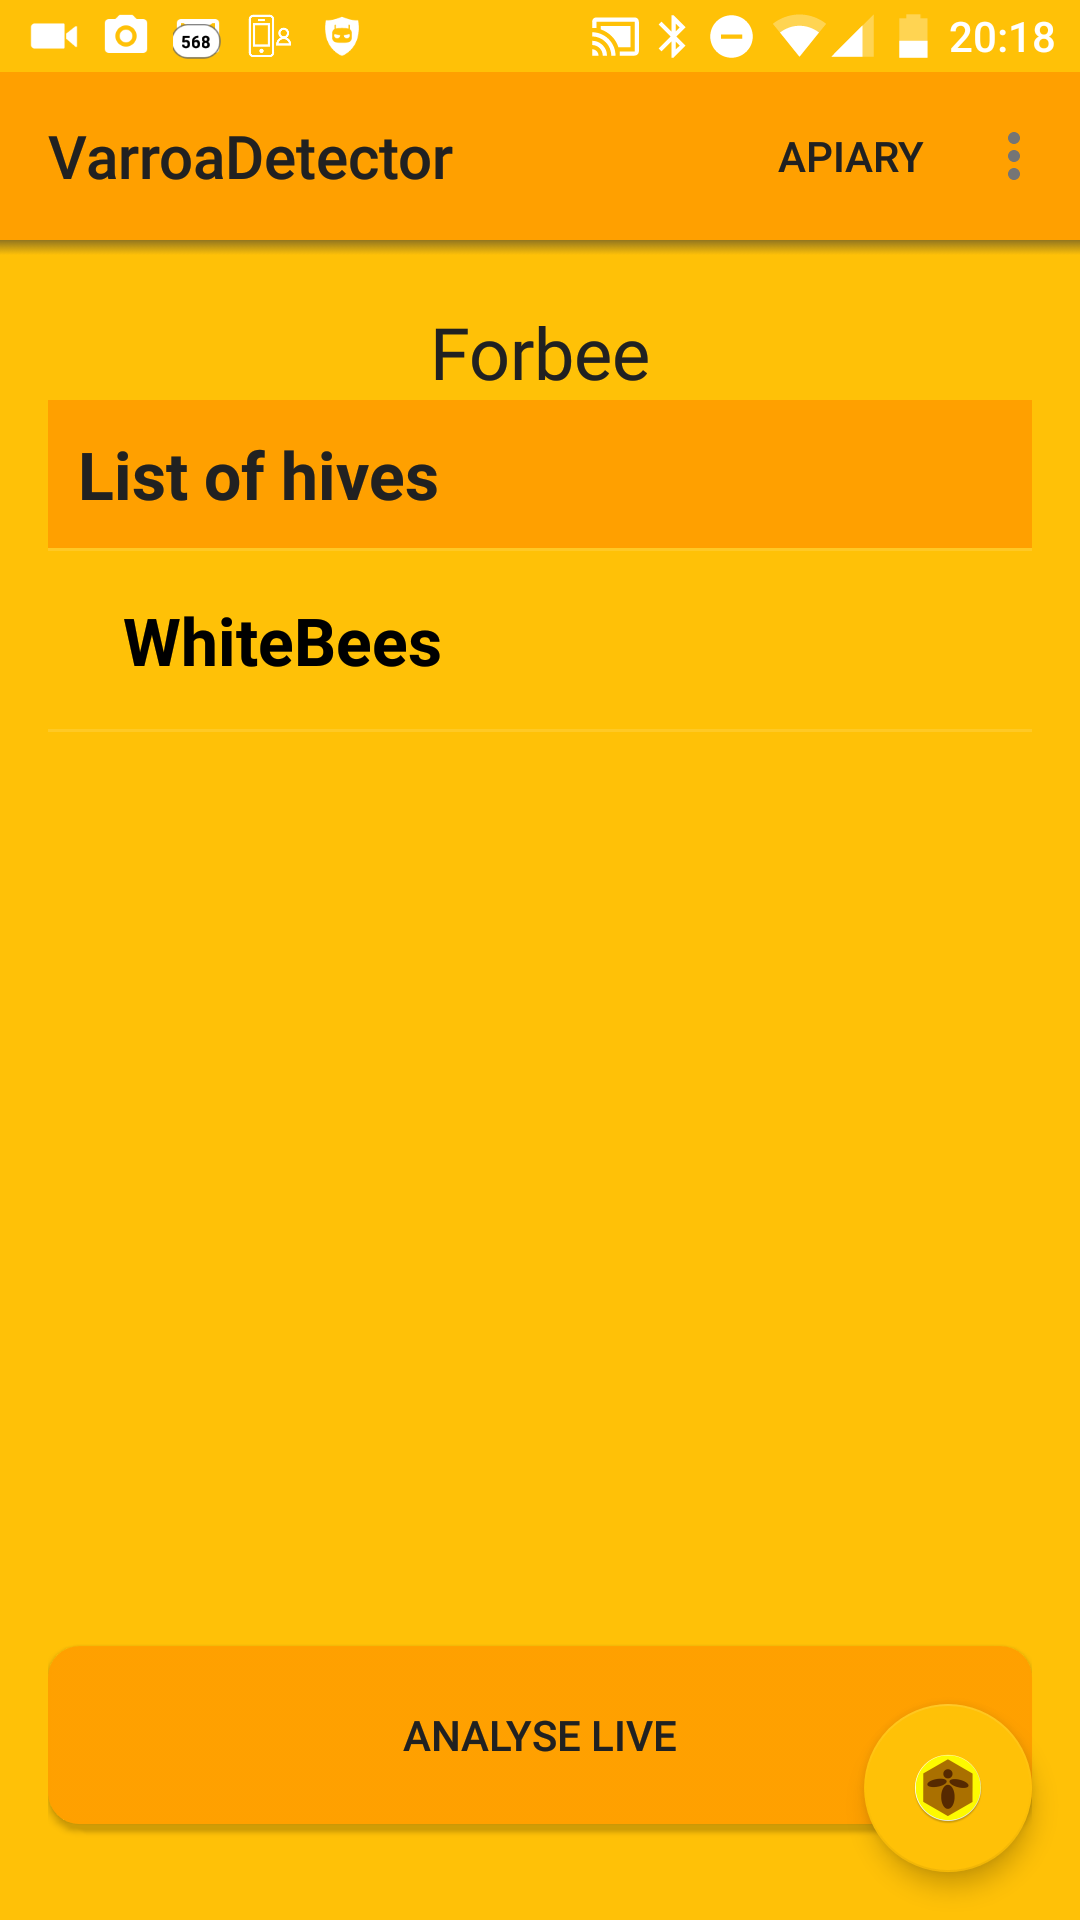
If you are done just tip on CLOSE and the bee hive will be added to your apiary. If you want to delete the bee hive a „long touch“ on the name in the list is sufficient to remove it. In our example we added the „WhiteBees“. Of course you can add more bee hives. If you have added all your bee hives then just tip on CLOSE again to save everything and return to the main menu.
Execute a Varroa Destructor inspection
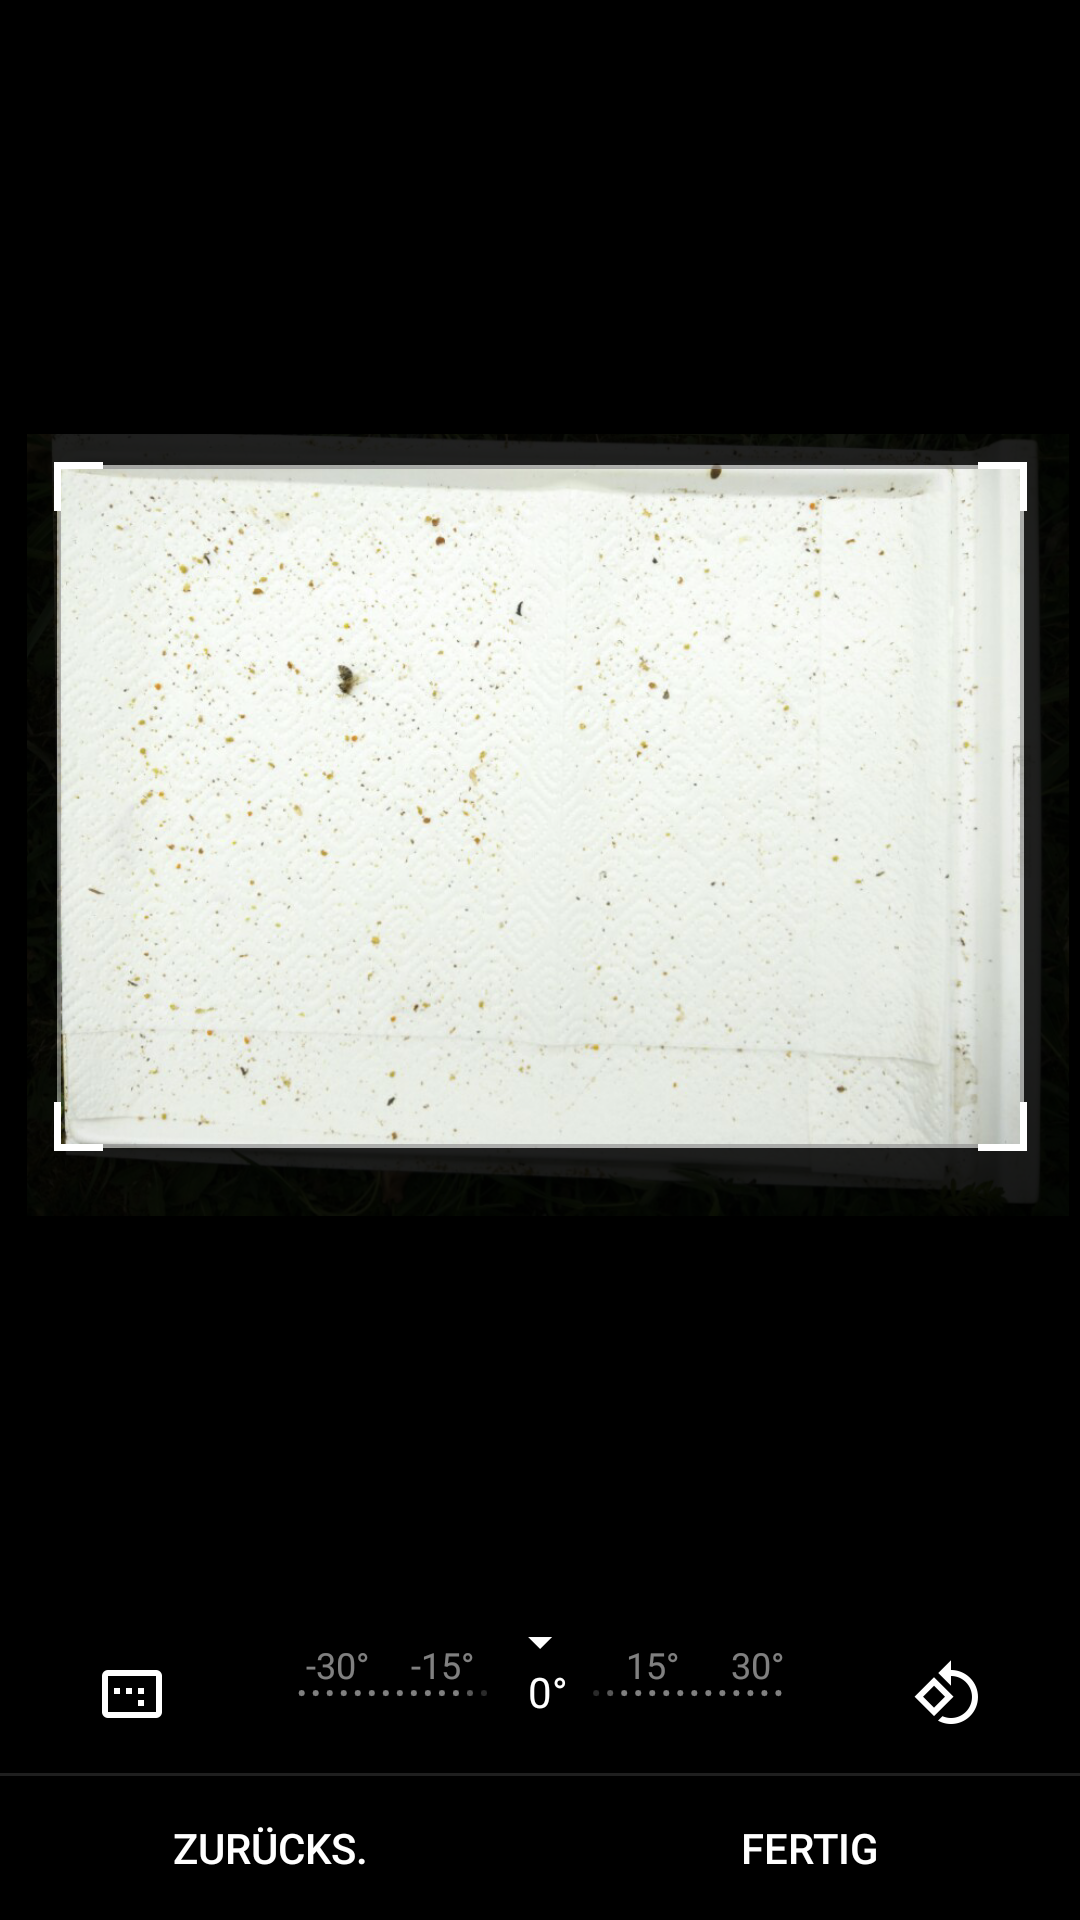
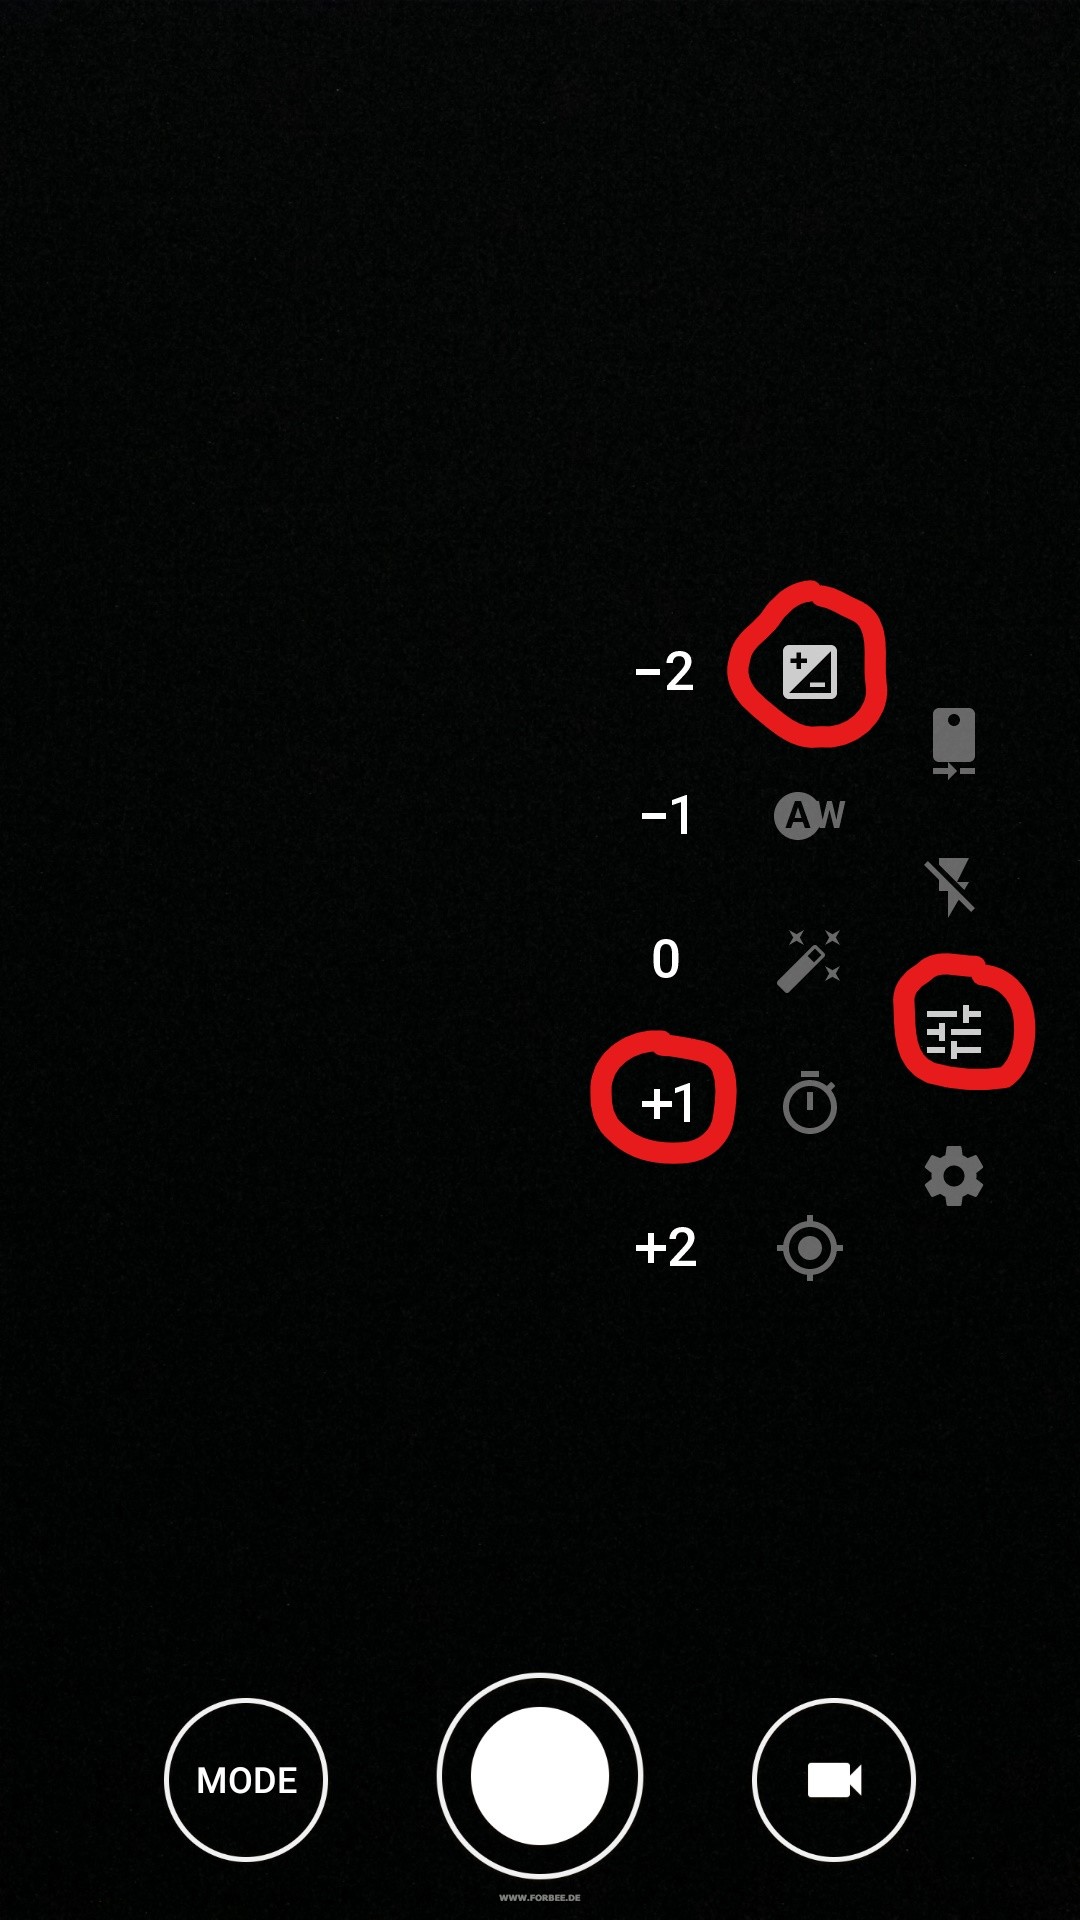
Now as we added all our bee hives in the APP we are ready to do our first Varroa inspection. For this we take a photo of the control plate of the bee hive. For better results it is proposed to take the picture with overexposure ( 1 f-stop). Additional you should trim the picture so that just the area is seen that shall be analysed.

Now it is time to start the automatic analysis. For this we start the Varroa Detector APP. Next we tip on the bee hive to which the photo belongs to. A tip to ADD ANALYSIS will open the analyse screen.
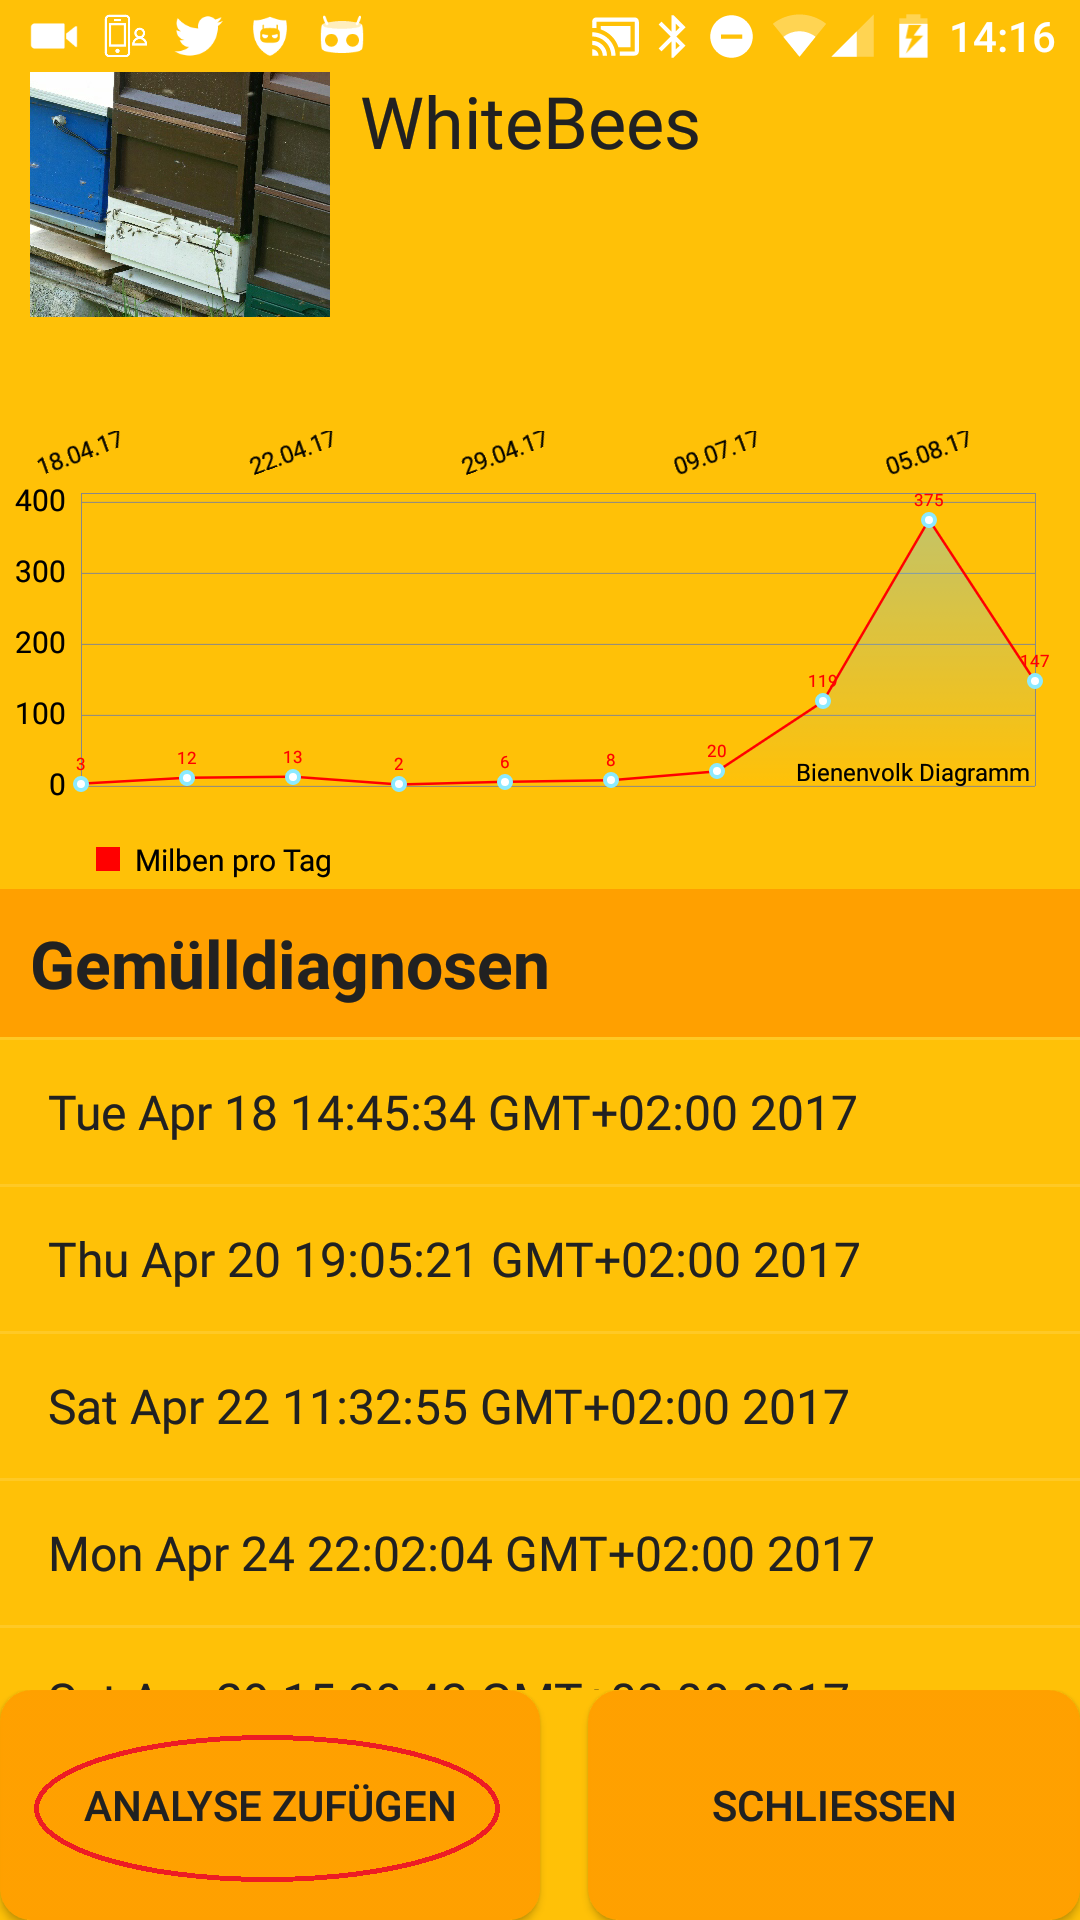
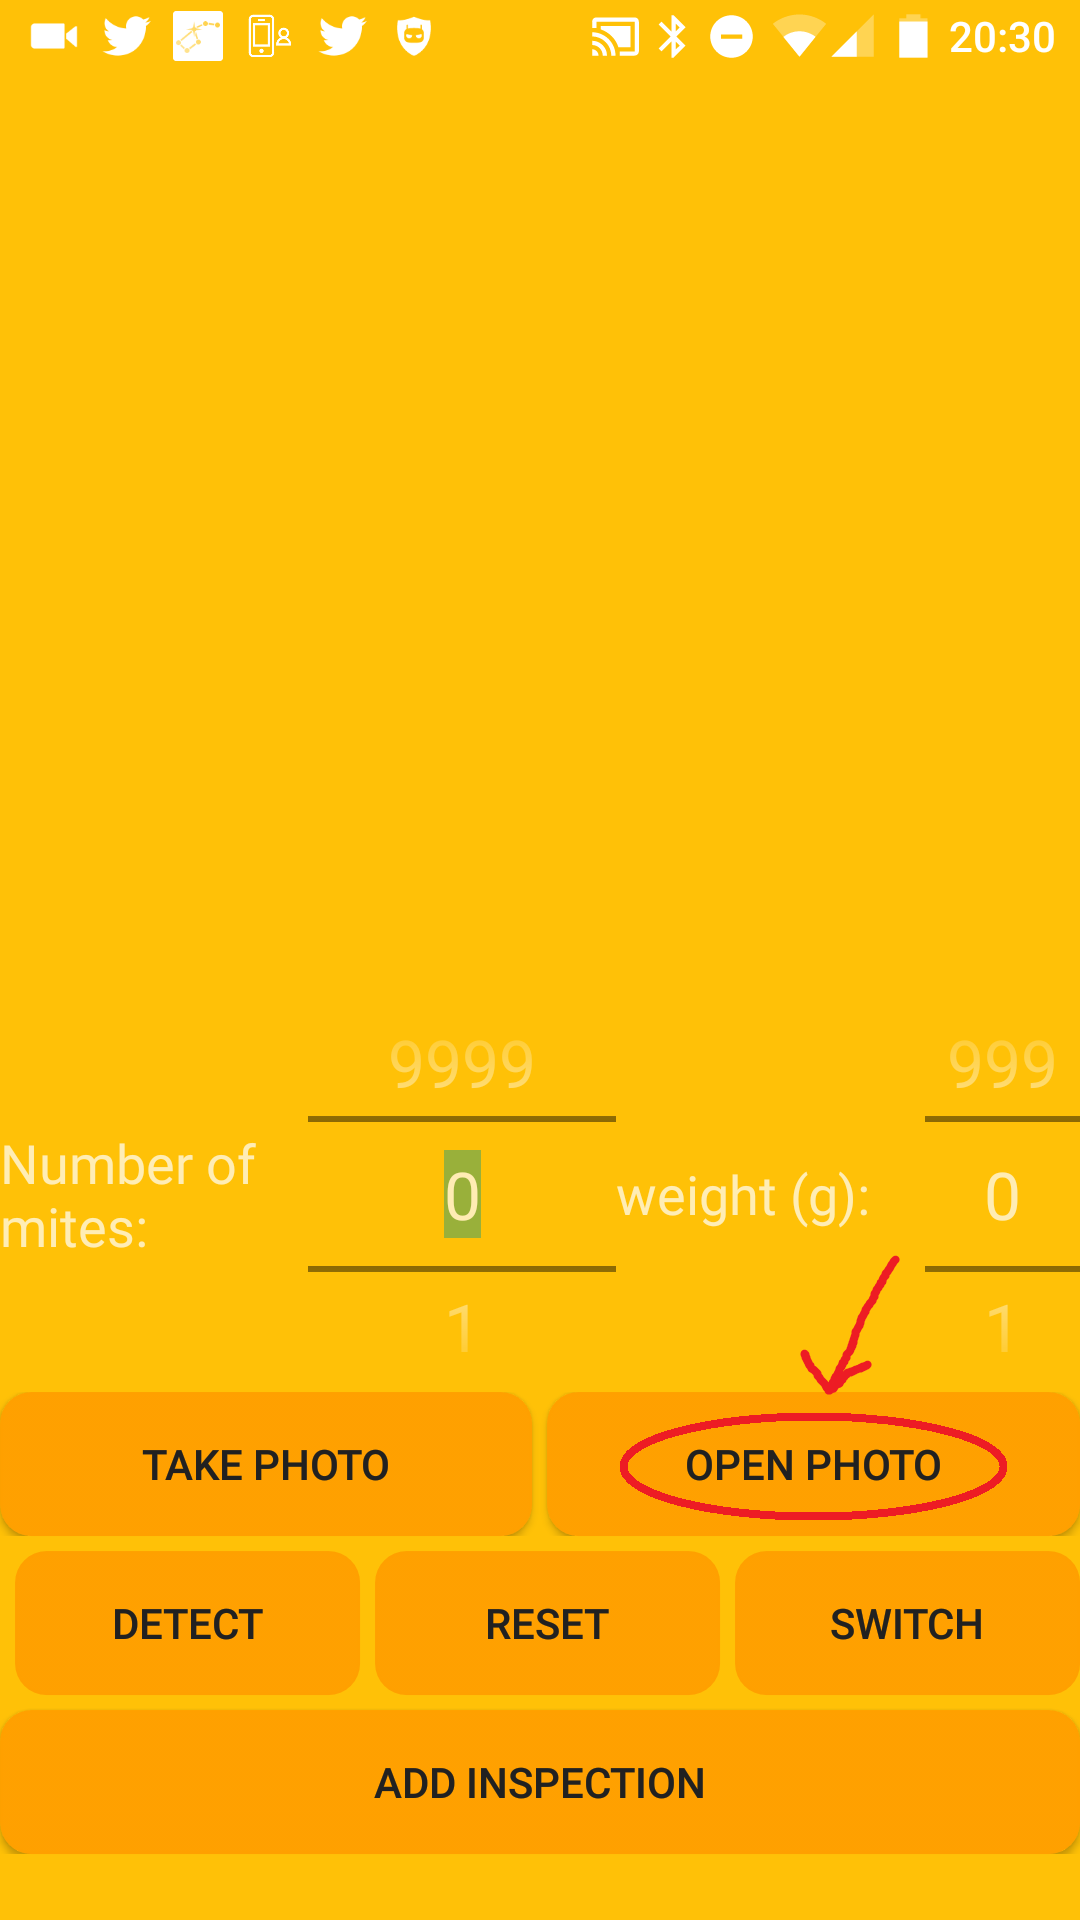
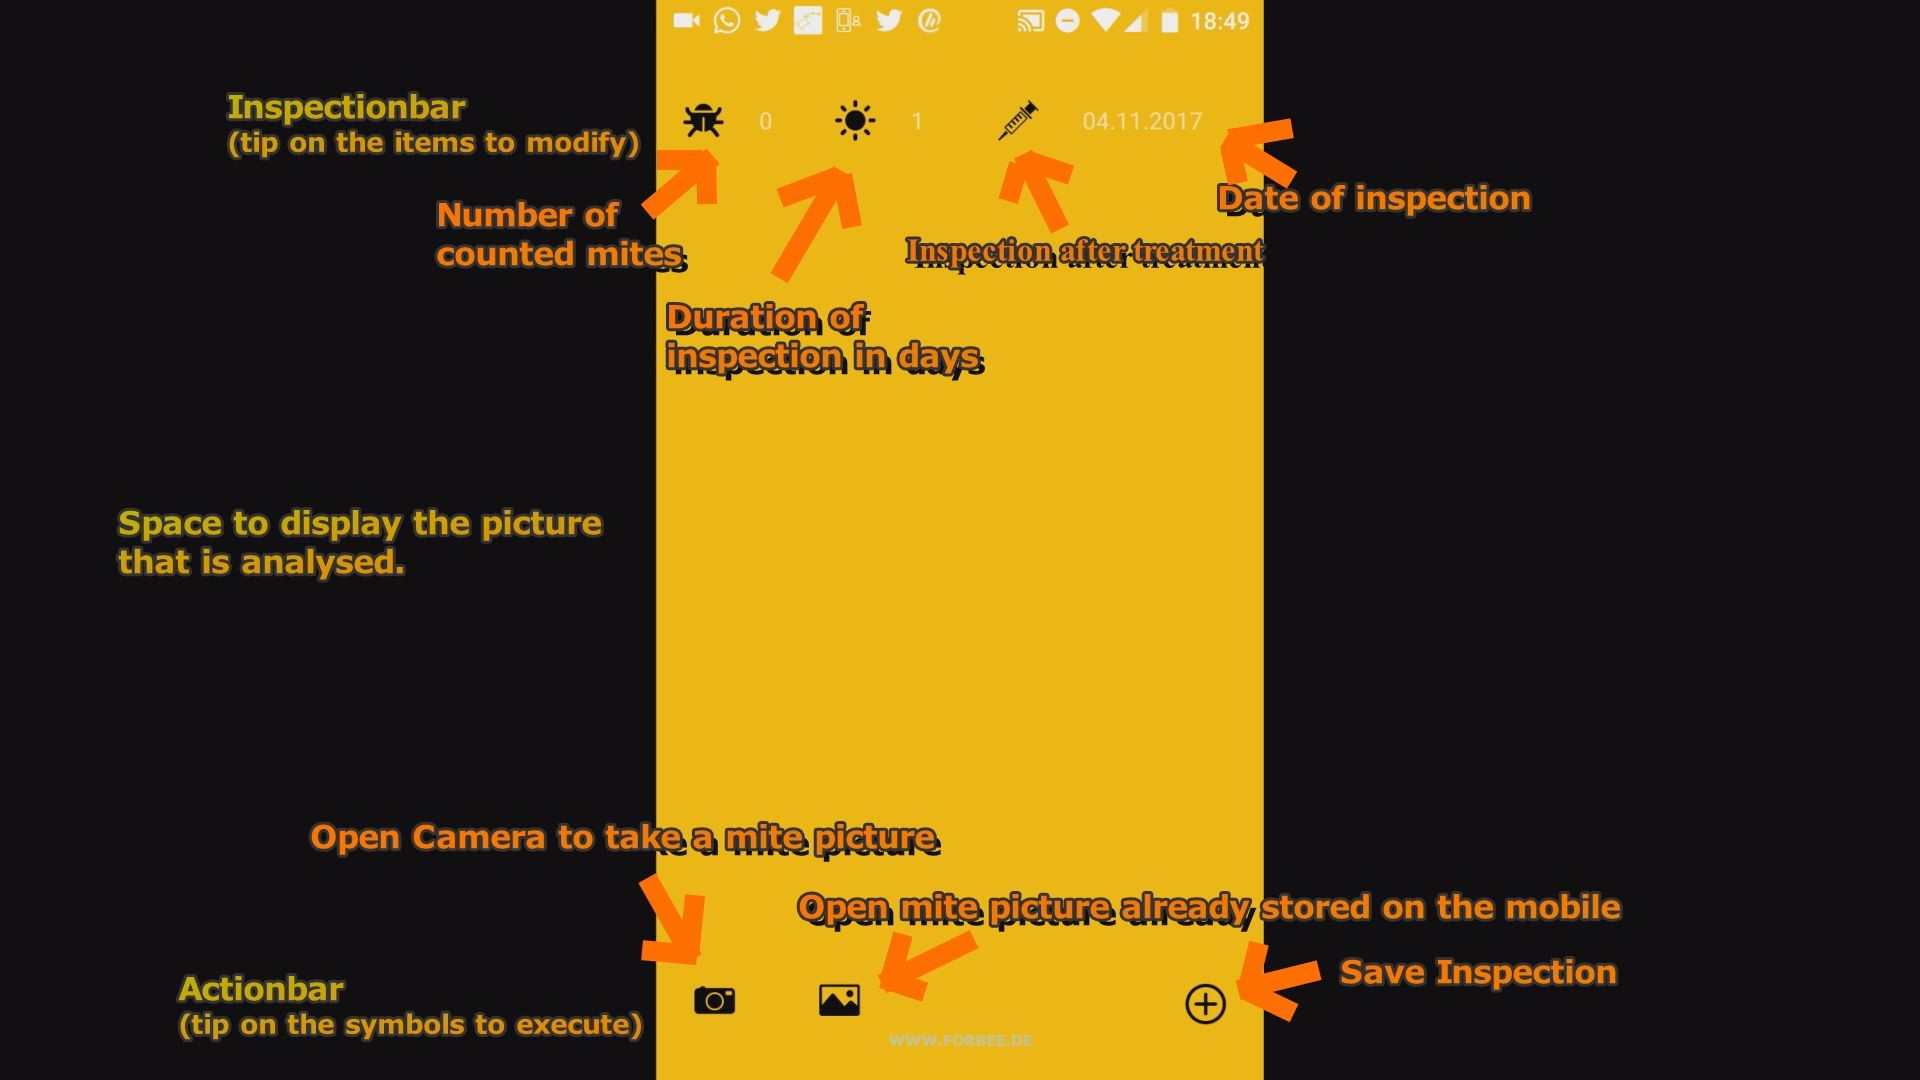

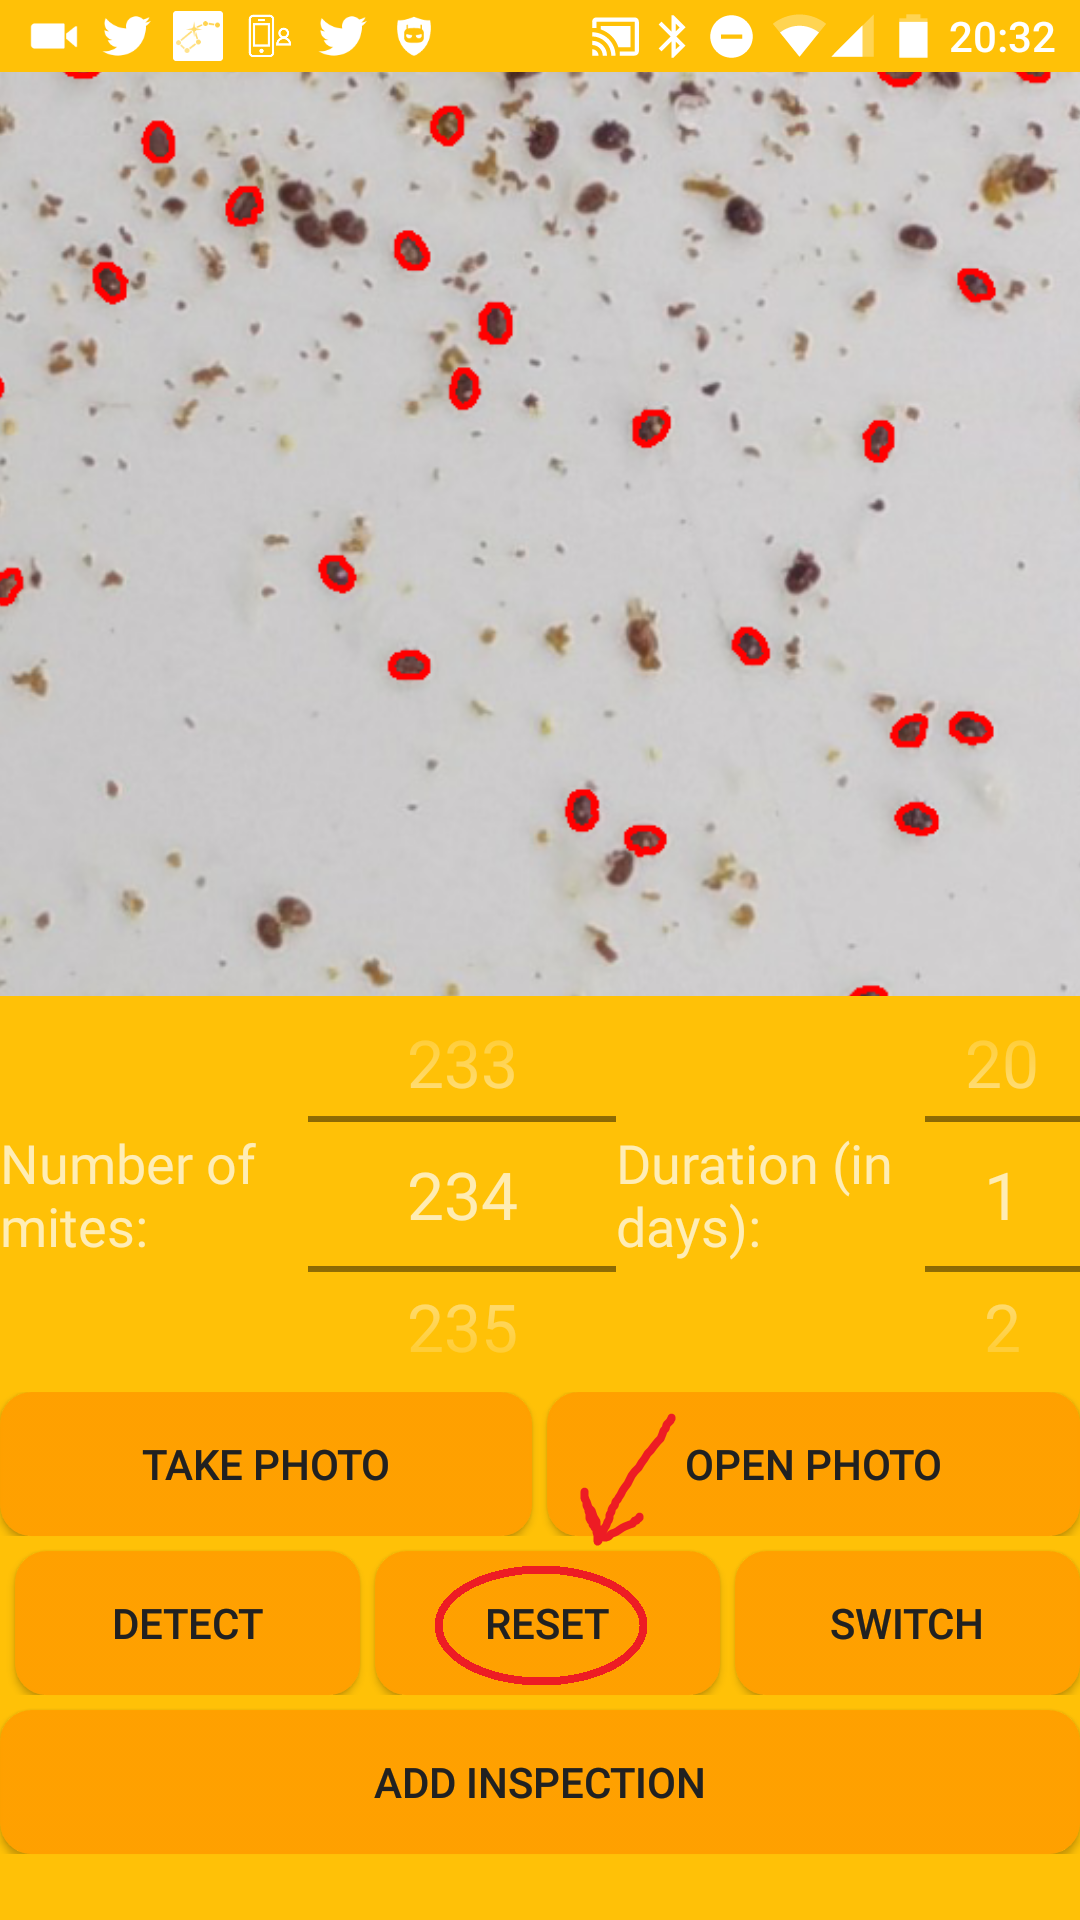
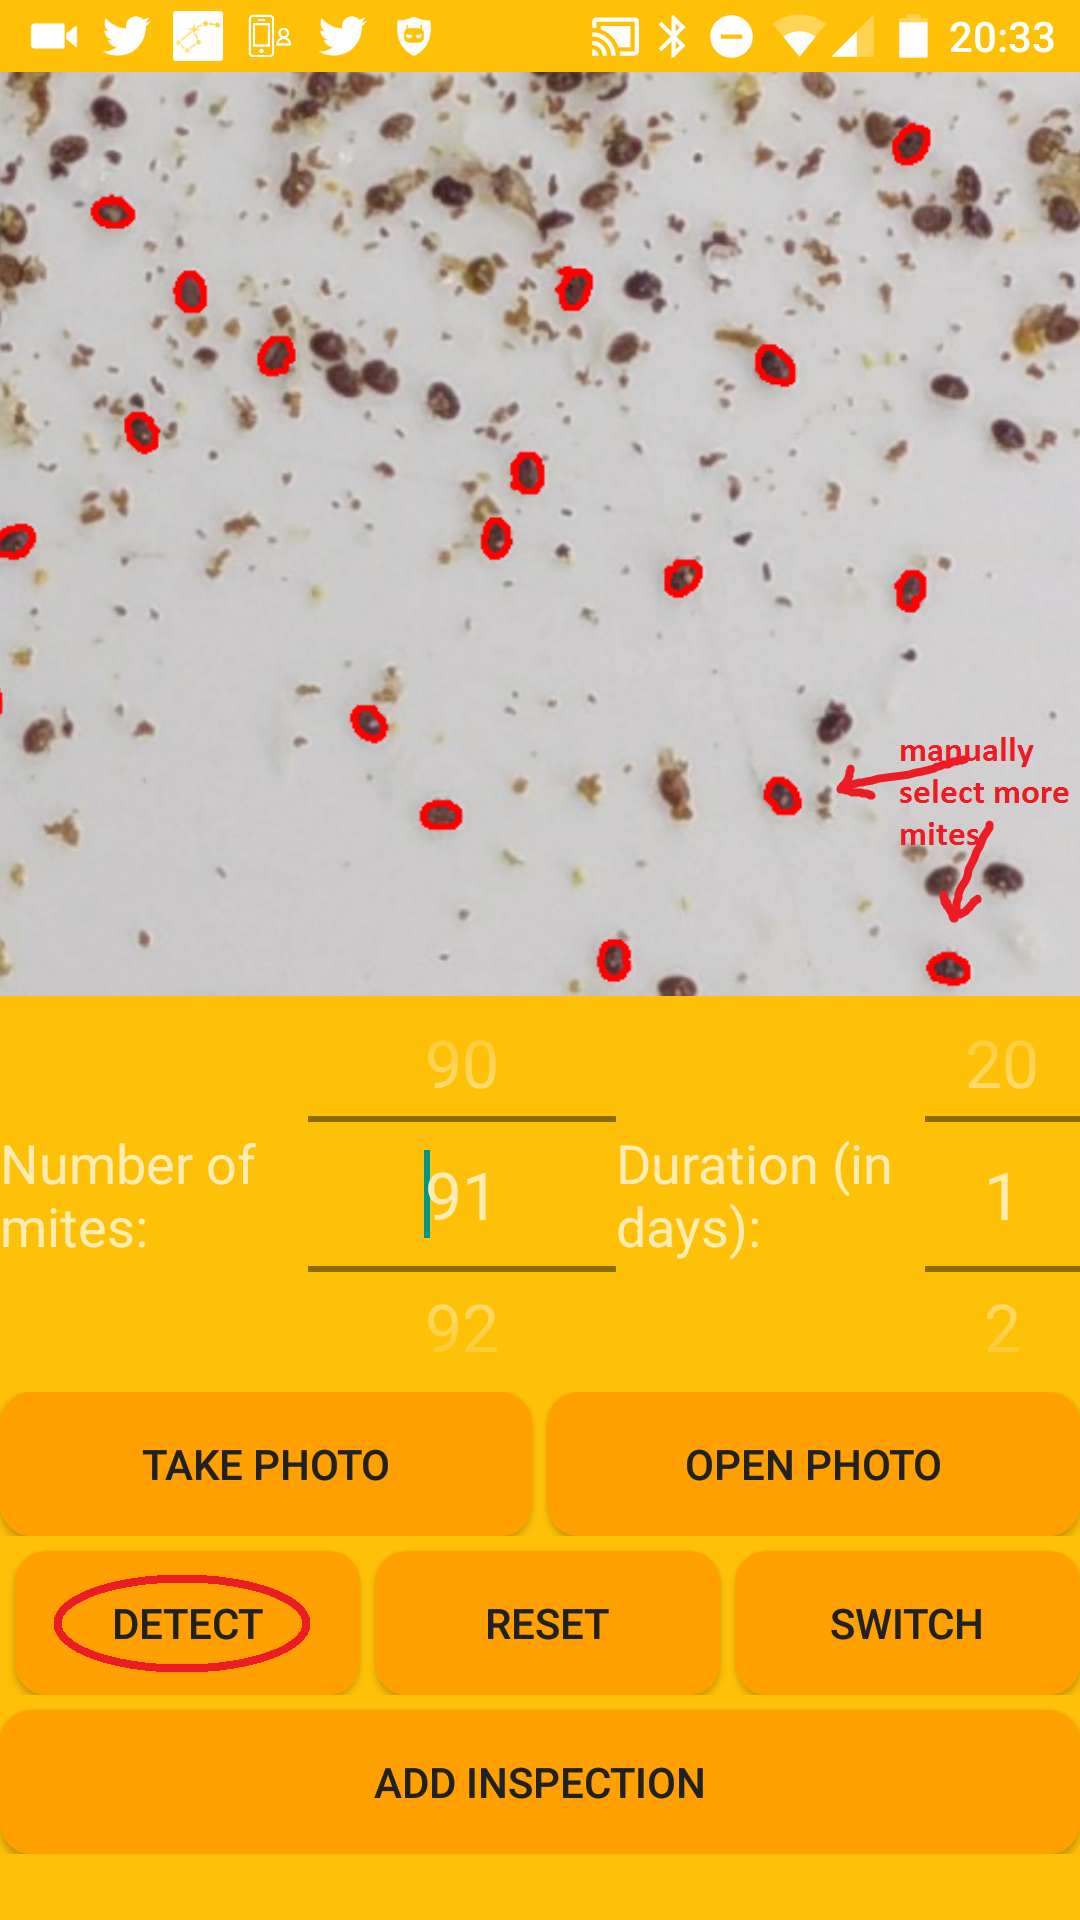
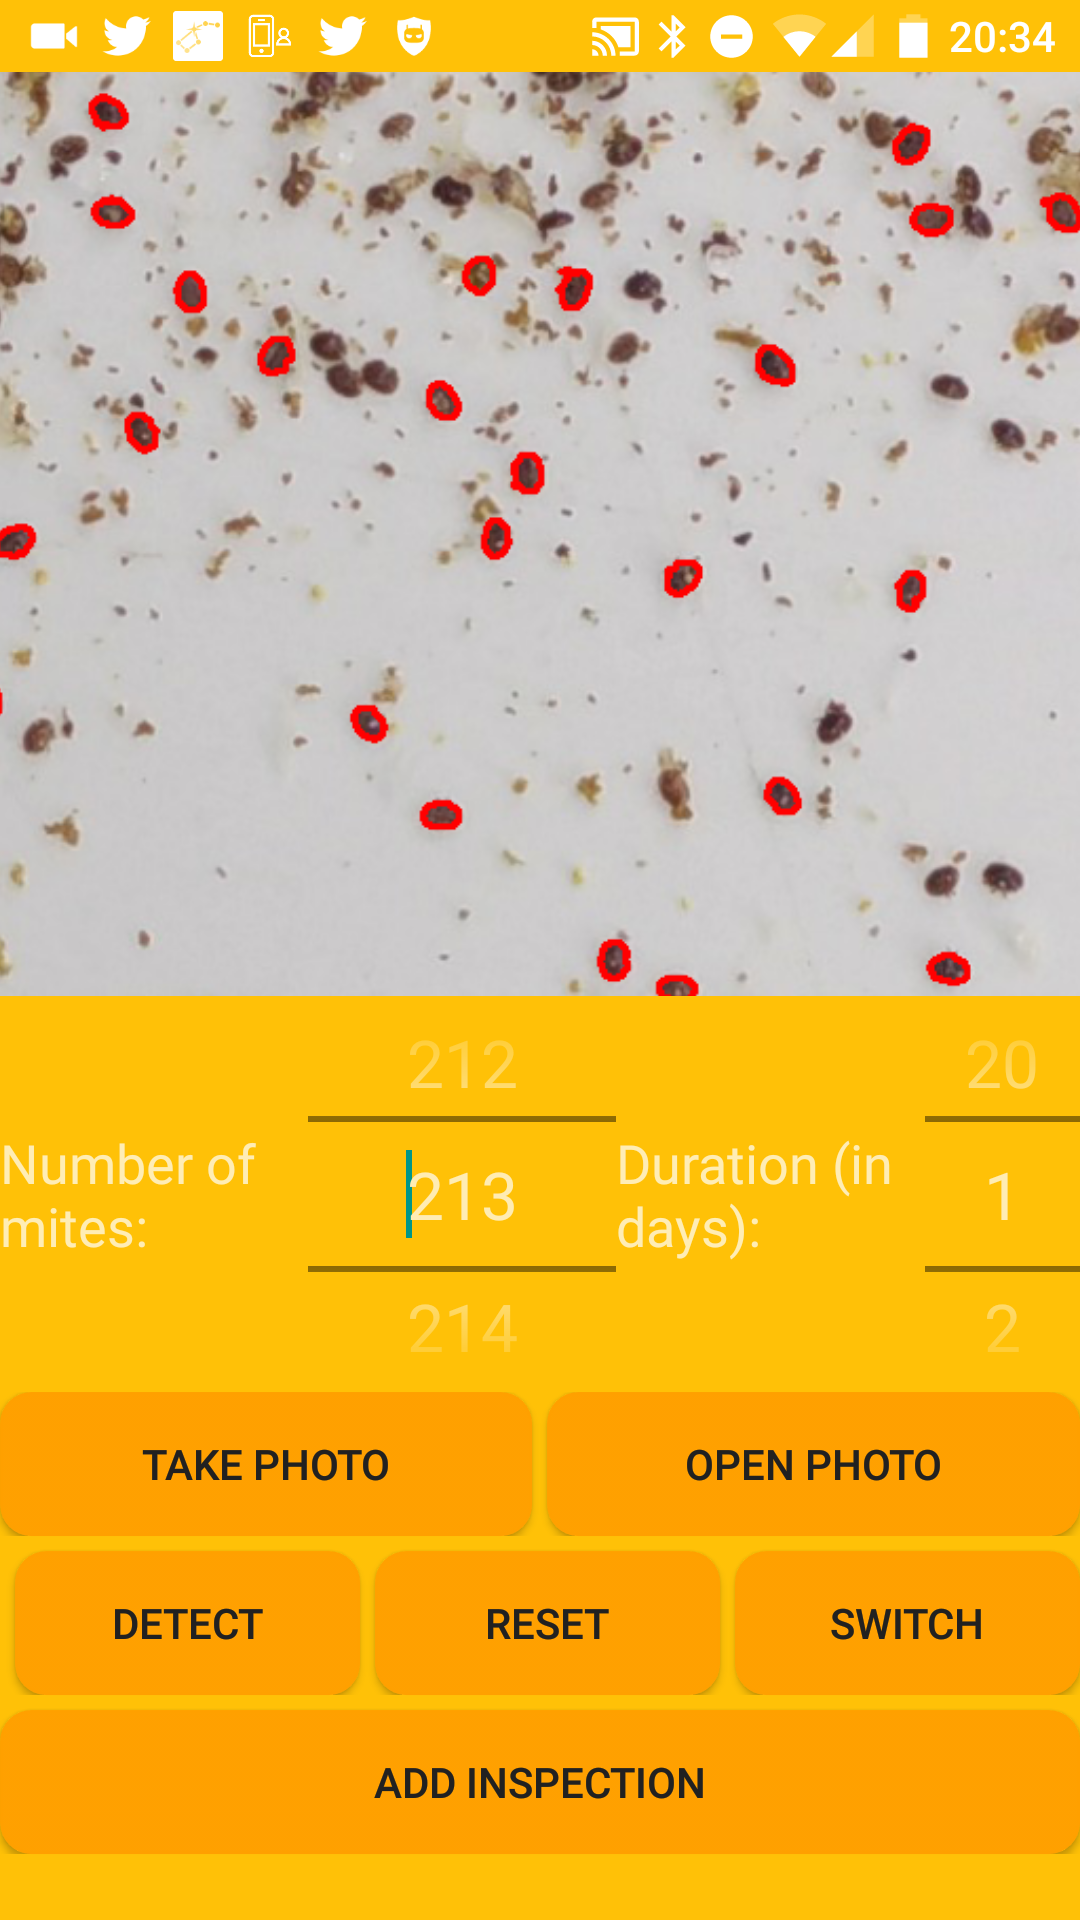
From Version 1.12 on the named buttons will be replaced by symbols to have a better overview (see screenshots with black background above). In the analysis screen there are two symbols in the left down corner. One is a camera- and one a picture symbol. If you tip on the camera you can directly take a picture with your mobile camera for the analysis. If you tip on the picture symbol you can use a picture already stored on your mobile. Due to the fact that we already have a picture stored on the smartphone we tip on the picture symbol. This opens a dialog in which we can select the taken photo. Selecting one photo will start the analysis. This might take a little bit of time and afterwards we see the selected photo. All automatically detected mites are marked in the photo. To see more details you can zoom in the picture. If necessary you can deselect marked „false positives“ and select mites that were not detected (just tip on the mite). So this is the manual correction step. New in Version 1.11 and above: It is now possible to tell the APP how a mite looks like. This can be done by manually selecting mites followed by a tip on the „loupe button“ (in the footer action bar). If the „loup button“ is pushed all selected mites are analysed and the thresholds are adapted in a way that all currently selected mites would be automatically found. Of course it is also possible that false positives are found. If the selection is too bad it is possible to deselect all mites by pushing the „broom button“. Then just select 5 – 10 mites manually and push the „loupe button“. The result will be that many more mites are automatically selected. It is possible to add more mites manually and then again push the „loupe button“ to find more mites (iterative approach possible). If the automatic detection is very bad right after a new picture is opened one possibility is to clear everything with the „broom button“, then select some mites manually by tipping on them and afterwards tipping on the „loupe button“. If you are satisfied you have to select the number of days the analysis took place (below the picture). This information is very important because it is a big difference if the mites have been fallen within one day or one week. That’s it. Just tip on ADD INSPECTION and the inspection is saved. For each bee hive you see the list of inspections (an inspection can be deleted by a long touch on the inspection entry in the list). Additionally you see a chart to get an impression about the Varroa trend of your bee hives.


Option menu
From the main screen you can enter the option menu. This menu offers you some more functionality like export/import to save all your data to a save location. It is also possible to change the settings of the automatic analysis. To change the settings of the photo analysis (for the procedure explained above) tip on Settings->Image Analysis. The following options can be changed (via NEXT MATCH and LAST MATCH you can get the values of a finding in the analysis – this might help in adapting these settings):
Shape similarity (S)
It is checked how similar the shape is to an ellipse. A value of 0 is a perfect ellipse. The higher the value the more shapes will be detected as mites.
Black/White Threshold
The picture is first converted to a black and white picture before the analysis is executed. The higher the value the more colors will be mapped to white. You can check the result if you click on SWITCH on the analysis screen.
Minimal Area (A)
The minimal area of a shape that is detected as mite.
Maximum Area (A)
The maximum area of a shape that is detected as mite.
Red-Value (R)
The red value threshold of a mite. If the value is below the threshold the shape is not recognised as mite anymore.